Wilderness: Close Up
Art Quilting Studio Magazine | Summer 2018
My Lichen Series connects 50 years of hiking, canoeing and living in wilderness cabins to a fascination with how art and science relate. Out int the country, I see small things via the face of my feet to my paddle. I record them in sketches and through thousands of photos on a post-and-shoot camera. The constituents of wilderness have been part of my textile artwork for over 25 years and lately have been my focus.
At home, or sometimes in the filed, I study my tiny friends with botanical keys and monographs on vascular plants, fungi, ferns and lichen. At home, I relate my sketched and photos to scientific drawings, especially Ernst Haeckel’s work. I draw and sometimes trace pant and cell forms, often from my own photographs. I audition them in various sizes using my copy machine to enlarge and reduce them to proportionally fit the motif I am constructing. Those sheets of various sized drawings go into a file for future use.
I dye and print the majority of the fabrics I use. On a regular basis, I devote a period of time to producing small pieces of cotton fabric in interesting, often experimental patterns and color combinations with no particular direction in mind. Doing the dye work ythis way offers a bigger range of possibilities when I start a piece, and limits the time it take to stop contraction to dye or shop for that missing something. My process is spontaneous, with the question of: “What if?” usually being the point of departure. Sometimes a shoe pos into my head; for example, my Lichen pieces are centered medallions. They often begin with a central motif that reminds me of microscopic forms.
Supplies
• Basic sewing supplies
• Batting: black polyester
• Copier w/enlarge-reduce feature
• Fabric: assorted, hand-dyed, commercial
• Felt Strips
• Fusible web (Pellon – WonderUnder)
• Iron
• Lightbox
• Permanent marker, fine-tipped
• Sewing machine
• Smartphone/Camera
• Batting: black polyester
• Copier w/enlarge-reduce feature
• Fabric: assorted, hand-dyed, commercial
• Felt Strips
• Fusible web (Pellon – WonderUnder)
• Iron
• Lightbox
• Permanent marker, fine-tipped
• Sewing machine
• Smartphone/Camera
Supplies
Think about your concept.What do you want to say? Are there images in your head or in your sketchbook that you want to pursue? Pinterest has wonderful images to help you develop your concept. Think about the overall size of your quilt. How big does it need to be? If you are working to a specific size, now is th time to mark it so you don’t have to crowd the finished image. When you begin to see an image, pull fabrics that appeal to you from your stash. Colors may be exotic or closer to realism – a color palette will emerge naturally. Be sure to include several values. Audition the background fabric options. How will your color palette show up on possible background fabrics? Some contrast is essential or else everything will disappear.
Pin the chosen background fabric to a design wall, being mindful of the overall size you want the finished quilt to be. Be sure the fabric is big enough to make size adjustments after you have started to develop the medallion. Use white felt strips to mark the size of the quilt; these can be moved in or out as the work develops.
Draft the images as outline drawings. Use a copy machine to enlarge or reduce individual components. Start drafting the specific shapes. Think about the sizes of the shapes in relation to each other. Generally, the shapes should radiate from the center and become proportionately bigger toward the outside edge. Trace the shapes with a fine-tipped permanent marker on the paper side of the fusible web using a light box. Remember to reverse the shape if deirection is important, such as for letters.
Cut out the fusible web shapes a l little larger than the outlines. Iron he fusible web tot the reverse side of the selected fabrics. Cut into pieces. Remove the paper backing as you assemble the pieces on the vertical design wall. Step back frequently to see if the medallion is balanced. When you are satisfied with the composition, gently iron the pieces. Iron on the vertical wall, at least to tack down the pieces so you don’t accidentally move anything. When you have everything tacked down, place the quilt top on an ironing board and iron over everything, particularly the edges.
Make the quilt sandwich and pin or baste it together. Free-motion-stitch around all of the pieces, changing thread color as appropriate. Introduce intentional irregularities by stitching around the shapes more than once. Quilt from the center outward as much as possible to help keep the quit flat. Consider echo quilting or an overall pattern for the background. Use a thread color that is visible, but doesn’t fight with the medallion quilting. Trim and bind the quilt with appropriate color/pattern binding. Add any final hand-embroidered accents, like seed stitches or French knots.
Tips
• I use a light box to trace the shapes in reverse on the paper side of the fusible web with a permanent marker. Oftentimes, I will fill a large piece of fusible web with shapes, keeping the leftovers in a file for later use.
• When I begin, I mark the center of the background fabric with chalk. The easier way to do this is to place a ruler diagonally from corner to corner and mark the center.
• I take process pictures of eery step as the quilt develops and always as the end of a work session. Photos can point out composition issues that need resolving before moving on to the next step.
• I use black polyester batting. It doesn’t “beard” like cotton batting and is easier to hand stitch.
• Choose embroidery thread to contrast in color or value. Hand embroidery is time-consuming, so make sure it shows.
Lichen Series by Charlotte Bird
Images in this gallery may not be copied or otherwise used without express written consent of the artist.
Click image to view in larger size or to begin the slideshow.
Click image to view in larger size or to begin the slideshow.
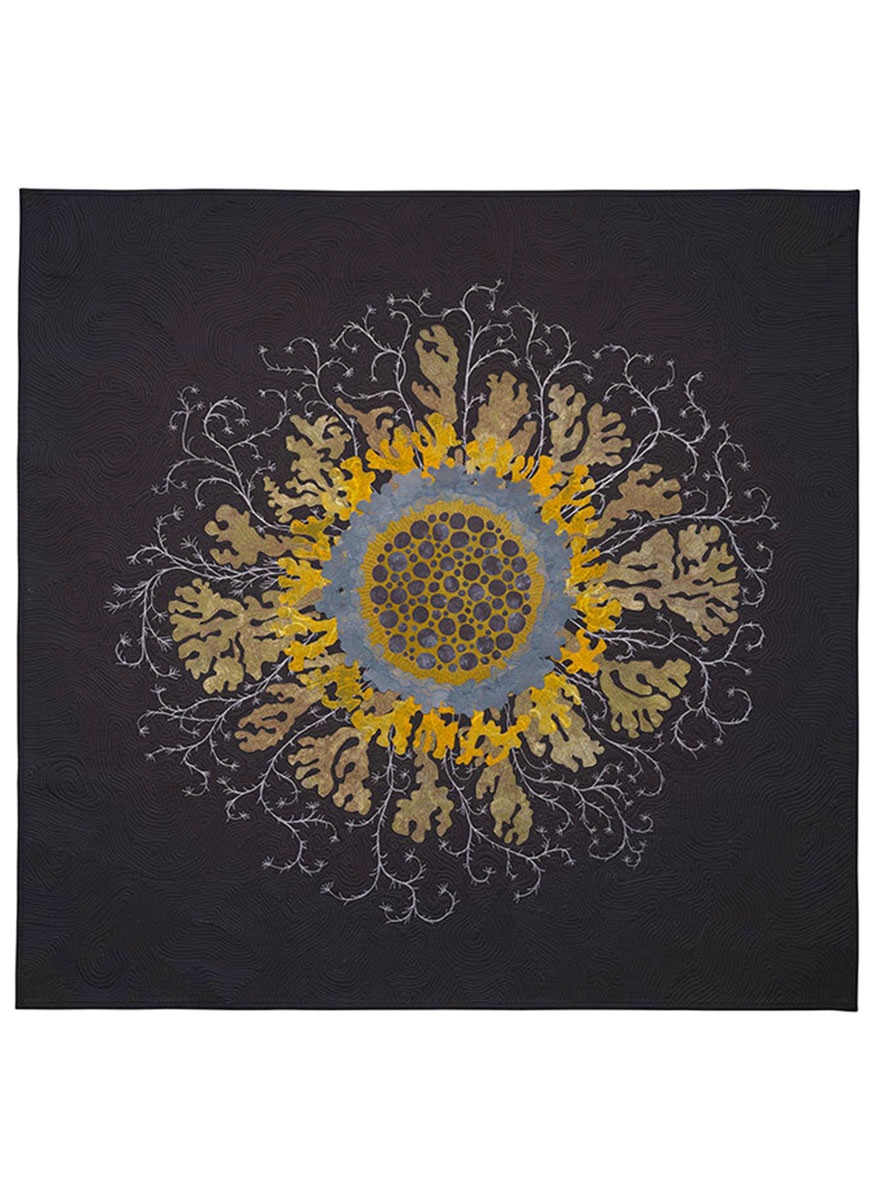
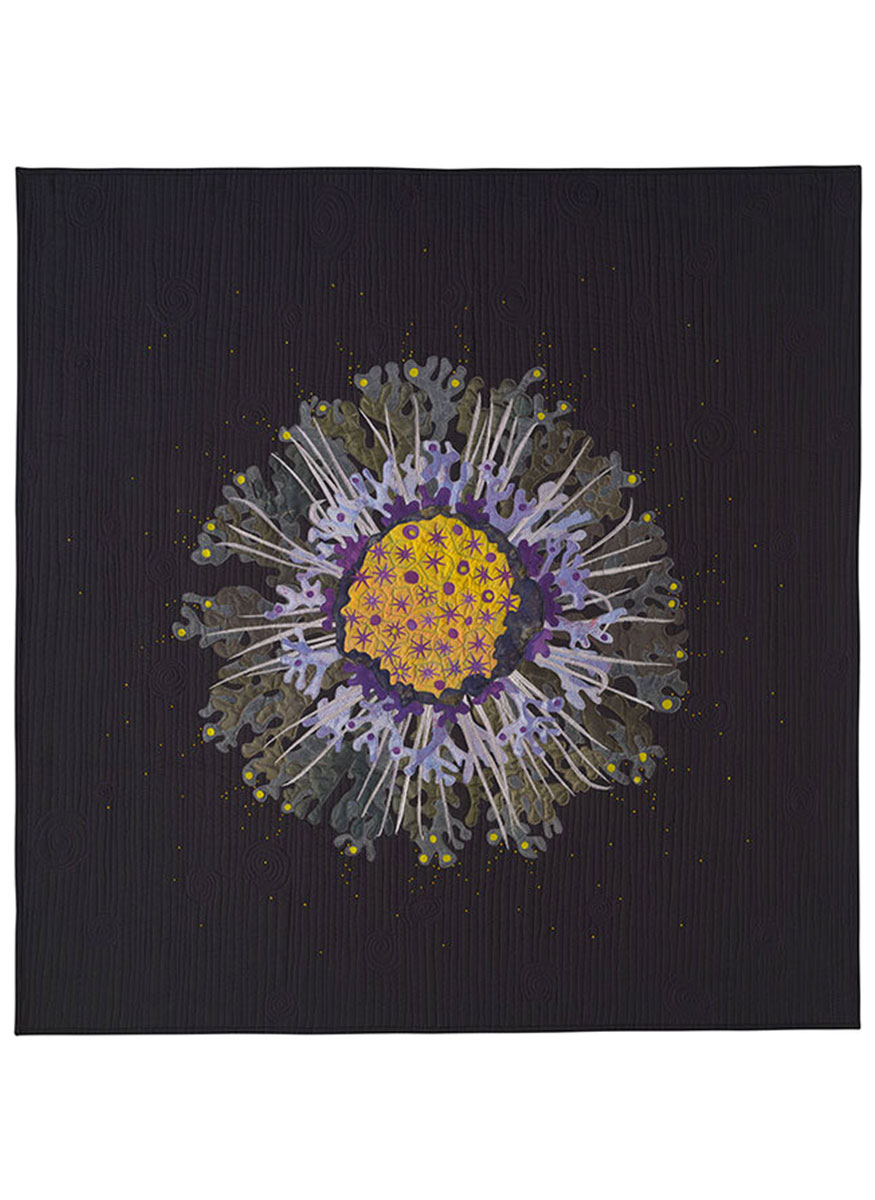
LICHEN NORTH
©2012 - 42” x 43”
Hand dyed and commercial cotton, polyester thread, perle cotton thread; hand cut and fused applique, machine stitched, machine quilted, hand embroidered
Photo credit: Eric Nancarrow
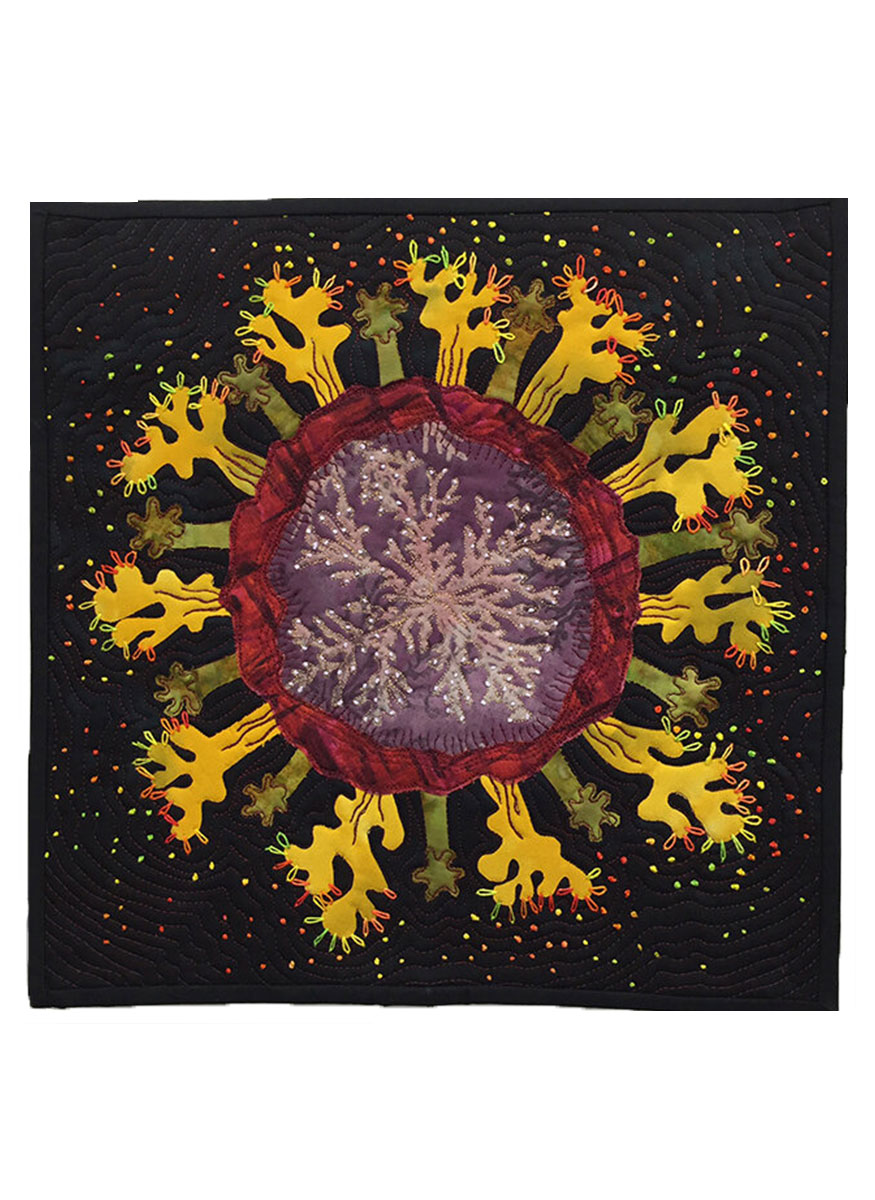
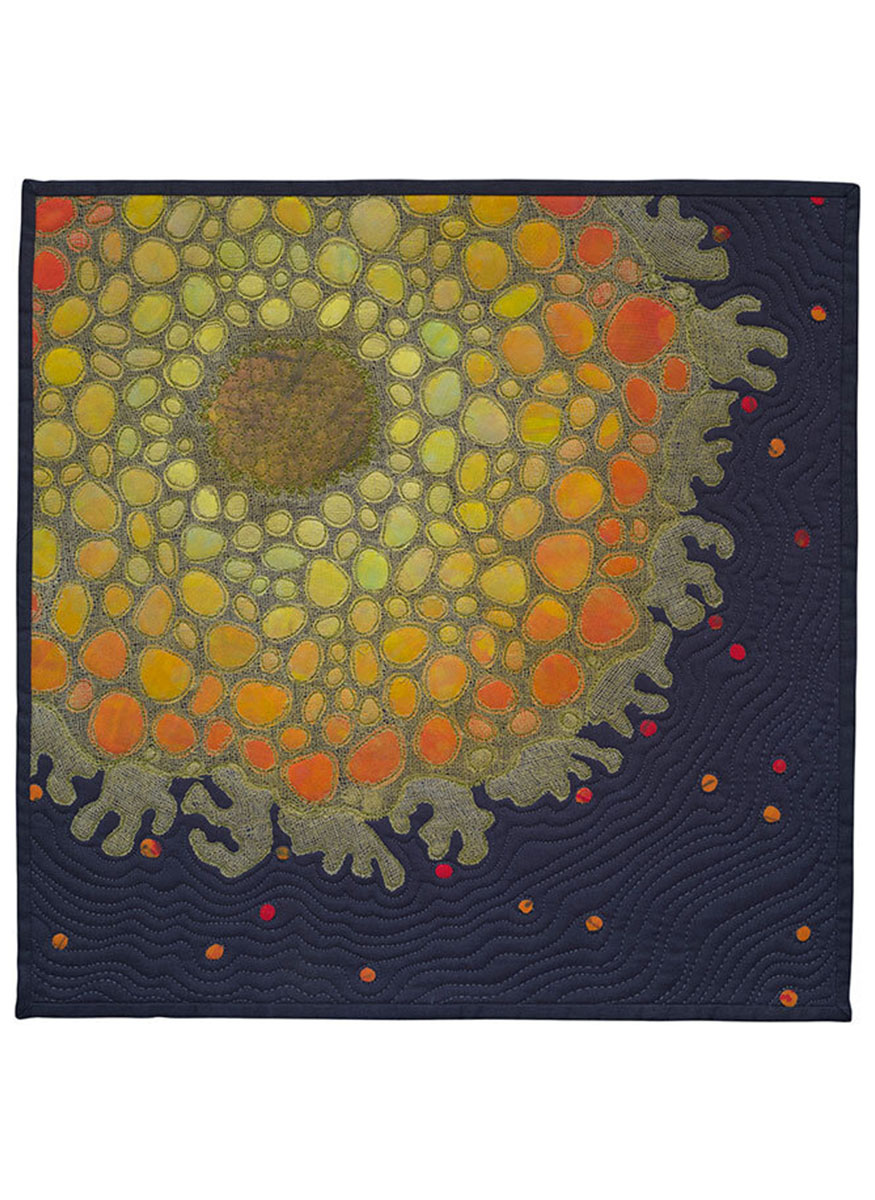
FOREST FLOOR
©2016 - 12” x 12”
2016 SAQA Benefit Auction Donation
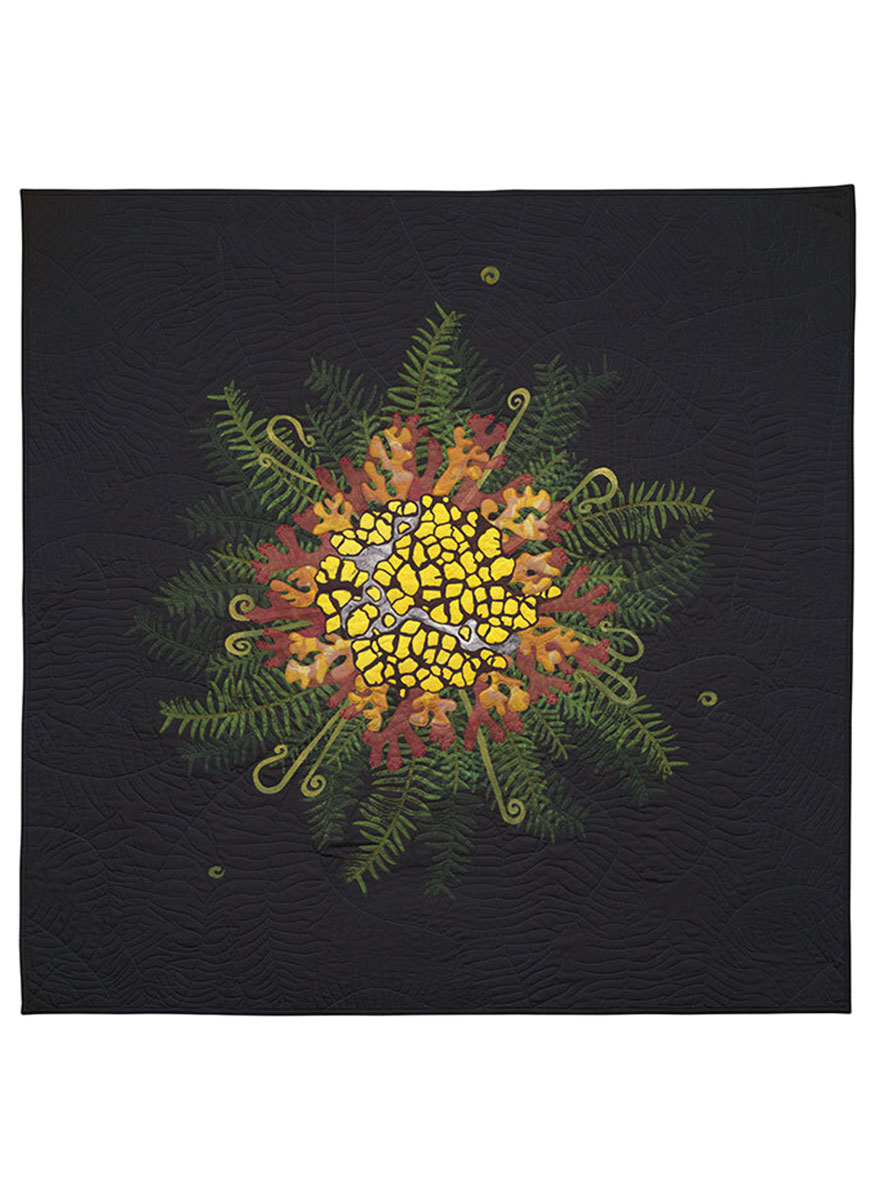
FOREST PRIMEVAL
43” x 43”
Poem by Rudyard Kipling Images and printed words by Joey Neilsen (age 5 ½)
Hand dyed and commercial cotton, polyester thread, prele cotton thread; hand cut and fuse appliquéd, machine stitched, machine quilted, hand embroidered
Photo credit: Eric Nancarrow
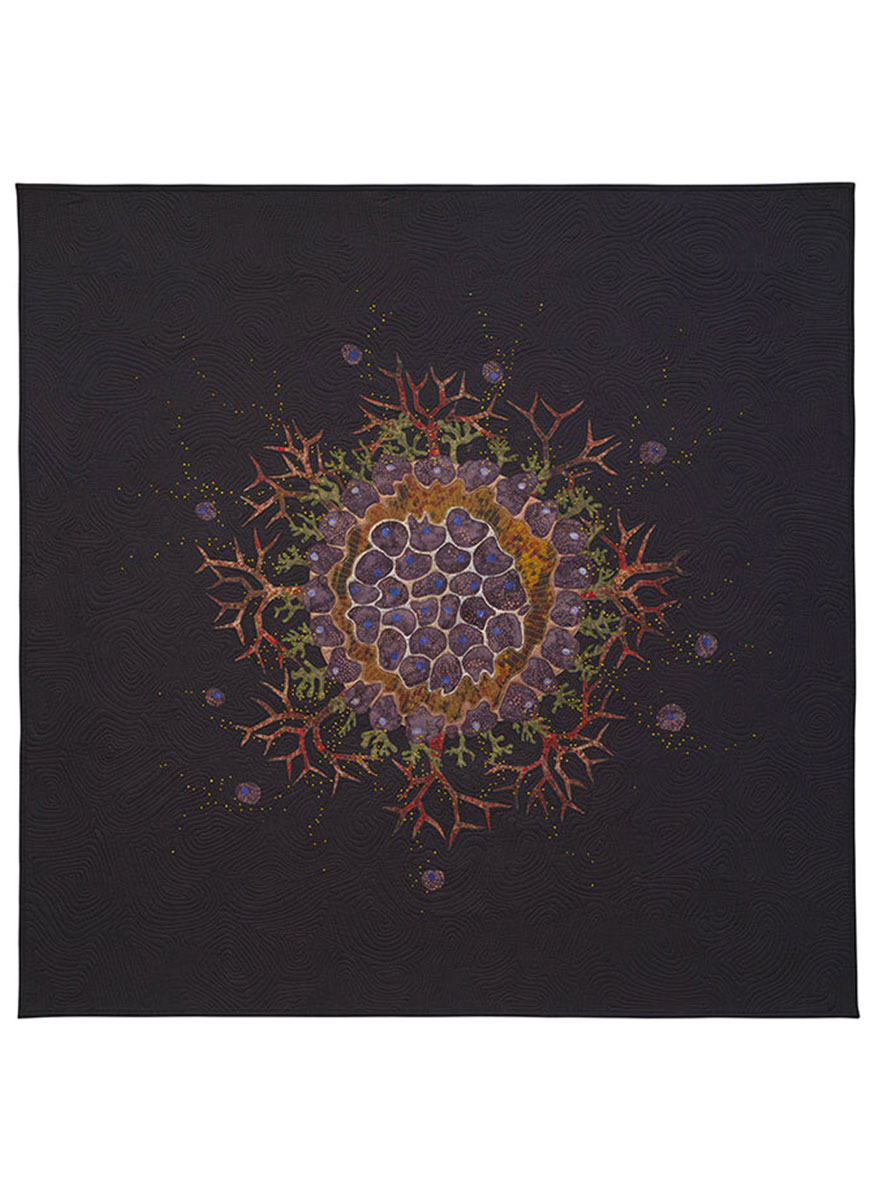
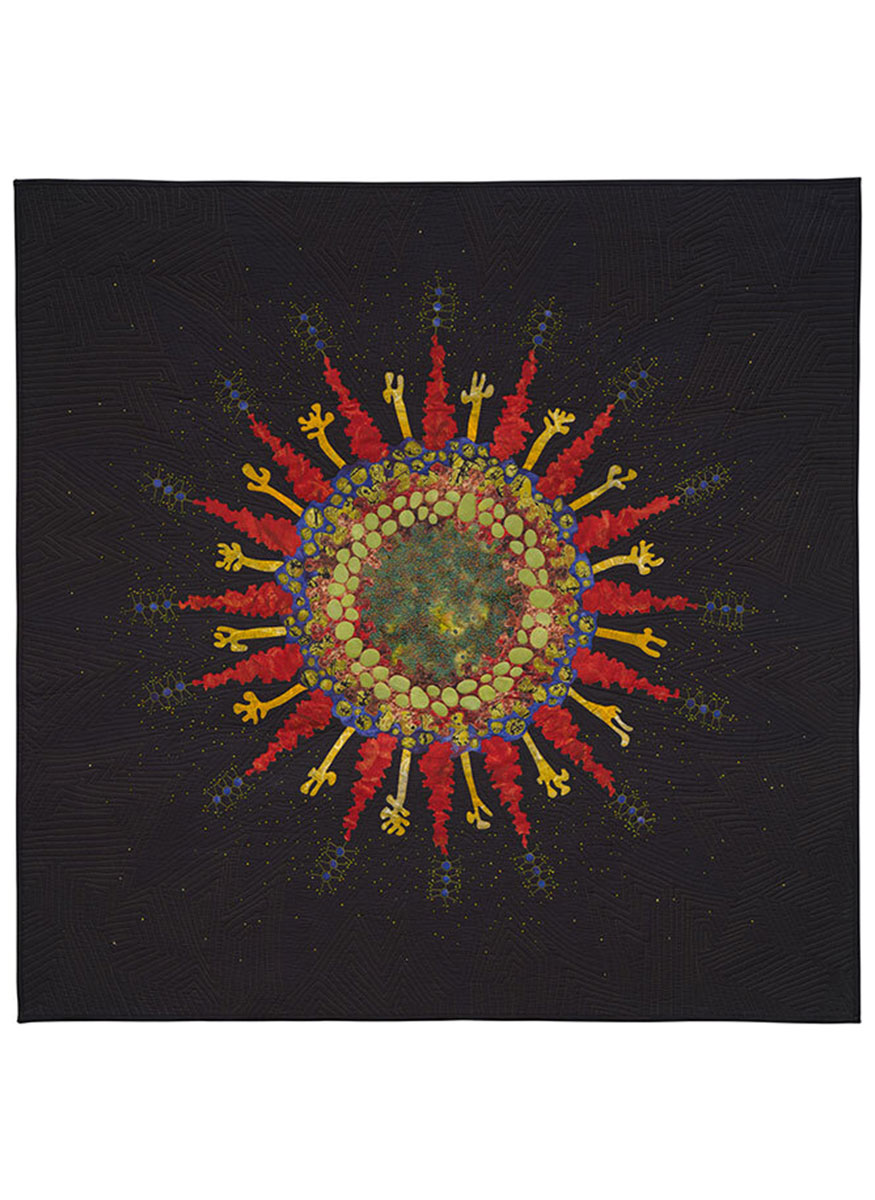
LICHEN LIVING FOSSILS 2: OLD AS GRANITE
©2013 - 43” x 43”
Hand dyed and commercial cotton, polyester thread, perle cotton thread; hand cut and fused applique, machine stitched, machine quilted, hand embroidered
Photo credit: Eric Nancarrow
Private collection
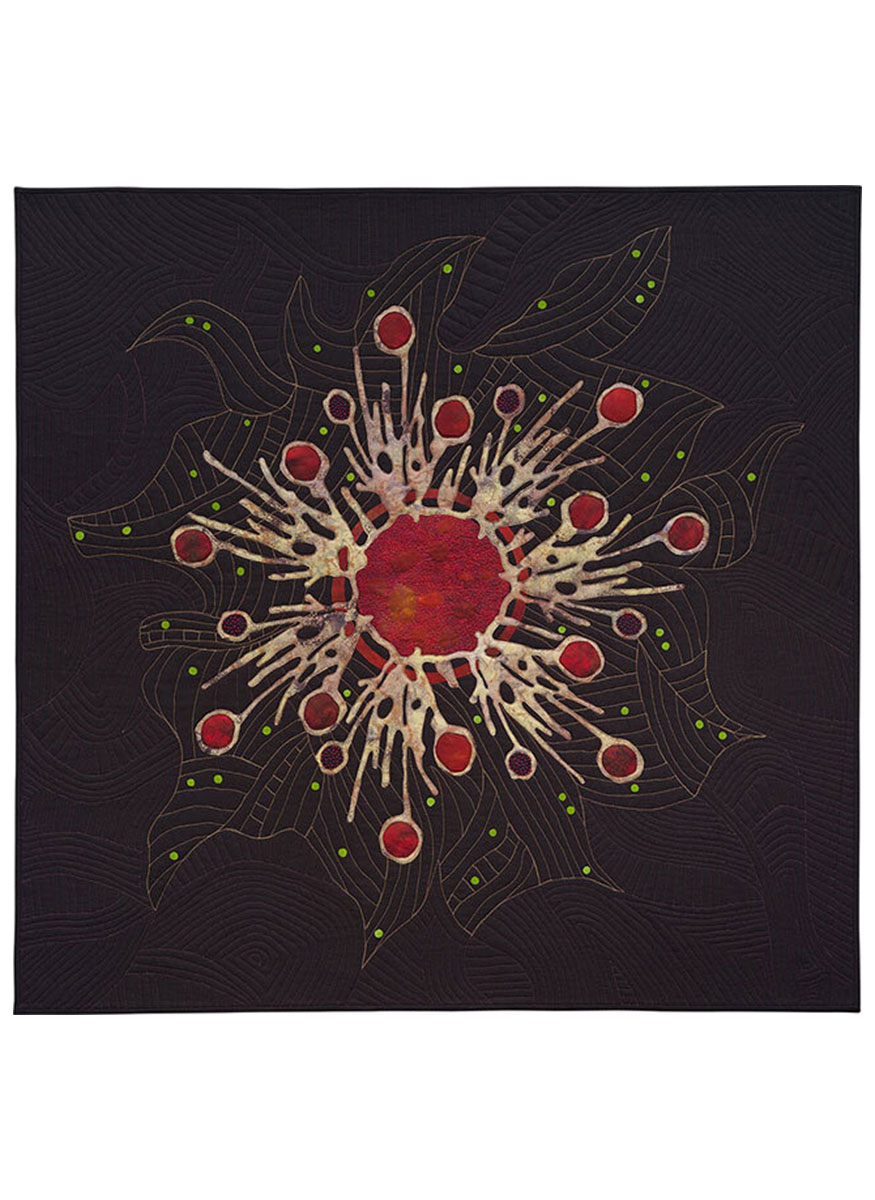
FRUITING BODY #9
©2012 - 43” x 43”
Hand dyed and commercial cotton, polyester thread, hand dyed (B. Tinling) perle cotton thread, poly batting; hand cut and fuse appliquéd, machine appliquéd, machine quilted, hand embroidered
Photo credit: Eric Nancarrow
LICHEN LIVING FOSSILS 3
©2013 - 43” x 43”
Hand dyed and commercial cotton, polyester thread, perle cotton thread; hand cut and fused applique, machine stitched, machine quilted, hand embroidered
Photo credit: Eric Nancarrow
LICHEN LIVING FOSSILS 1
©2012 - 43” x 42”
Hand dyed and commercial cotton, polyester thread, perle cotton thread; hand cut and fused applique, machine stitched, machine quilted, hand embroidered
Photo credit: Eric Nancarrow
HABITAT GRANITE 1
©2013 - 34” x 36”
Hand dyed and commercial cotton, polyester net, artist's photograph printed on cotton by Spoonflower, perle cotton thread, polyester thread; hand cut and fuse appliquéd, machine stitched, machine quilted, hand embroidered
Photo credit: Eric Nancarrow
POLYTRICHUM SP
©2012 - 12” x 12”
Hand dyed and commercial cotton, polyester thread; hand cut and fused applique, machine stitched, machine quilted
Photo credit: Eric Nancarrow
Private collection
LICHEN 3
©2012 - 15” x 15”
Hand dyed and commercial cotton, polyester knit, polyester thread, perle cotton thread; hand cut and fused applique, machine stitched, machine quilted, hand embroidered
Photo credit: Eric Nancarrow
Private collection
LICHEN 1
©2012 - 15” x 15”
Hand dyed and commercial cotton, cheesecloth, polyester thread; hand cut and fused applique, machine stitched, machine quilted
Photo credit: Eric Nancarrow
Private collection
HABITAT GRANITE 2
©2013 - 40” x 30”
Hand dyed and commercial cotton, artist's photograph printed on cotton by Spoonflower, perle cotton thread, polyester thread; hand cut and fuse appliquéd, machine stitched, machine quilted, hand embroidered
Photo credit: Eric Nancarrow